Installing Zentyal Small Business Server with Software RAID
I looked around for a decent installation guide for installing Zentyal in a software RAID. Even the Zentyal WIKI didn’t show much love. This is perhaps the most thorough how to install Zentual in a software RAID online to date (Feburary 23rd, 2013). I went through this before but with CentOS but that’s pretty well documented online. CentOS’s manual installer with LVM is a bit different but similar enough that using the Zentyal wizard brought back the memories. It has been a LONG time since I did it and I never did put it into production because I didn’t trust the install even though looking back it probably was a solid setup. That setup was slightly different anyway since it used a mix of hardware RAID1 and Software RAID1 to essentially give me RAID 10 (I think…) but with slightly less performance than an actual RAID10. I mirrored the physical disks then mirrored them with software on top of that. Maybe a new name could be Ghetto RAID? It would have been confusing I’m sure if a disk did go bad probably so I shy’d away from using it in the end. That system was for myself anyway not for anyone I was doing work for.
A brief overview of RAID if you care:
RAID 0 = No redunancy, disks are essentially put together to extend your storage so two 250 GB RAID0 disks = 500 GB of storage
RAID1 = A disk mirror, you can lose 1 disk and still be OK, you need 2 disks minimum to use it
RAID5 = Has some kind of parity stripe that allows you to lose 1 disk and still be OK, you need 3 disks minimum to use it
RAID10 = Has parity and mirroring to give you redundancy and performance, you need 4 disks minimum to use it
More on RAID here as I’m sure you want to be enlightened.
There are times when you can’t do hardware RAID, like when I bought a commodity server for a client who needed a server on a shoe string! The server was a $150 dollar OEM Dell Server but it was a special one only their VERY large customers could buy. I suspect it was from a Google, FaceBook or some other huge client that had Dell specially build a low end server that company could use for their CDN (Content Delivery Network). It’s weird, it looks like a Dell 1950 for the most part but has an AMI Bios, it only does hardware RAID 0 and 1 and you can slap 3 SATA disks into it. So then for only a few hundred dollars more we bought 250 gig, Western Digital “Enterprise” SATA drives and they had a solid Zentyal server with software RAID5 and all that Zentyal has to offer with a touch less than 500 GB of storage on their network. All for well under $500 dollars! I can do shoe string quite well, the nice thing about it too is it’s a Dell Dude! Whenever you can go with a decent hardware RAID setup, the software is better in the on board controllers, there are batteries on them I think so in case of a power loss it won’t lose data and is usually a “best practice”
Installing Zentyal in a software RAID:
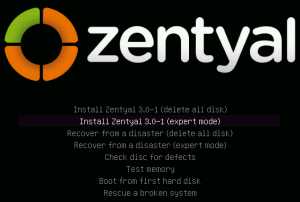
Lets get started, mostly images here with little comment. I assume you know how to boot up into the installer. If not we’re in trouble! I like using an app to install it on a pen drive and I boot to that since the system I had didn’t have a CD-Rom or DVD drive.
Screens not show are (and what I chose as selections):
Language: English – English
Country, territory or area: United Sates
Configure the keyboard: No
Country of origin for the keyboard: English (US)
Keyboard layout: English (US)
Hostname: zentyal <– Here’s where you can get creative, I like giving interesting cultural God names like Zeus or Apollo (Also known as “The Lads” on Magnum PI) :P
E-mail address: Don’t put anything, just continue
Username for your account: Whatever you want to log in with
Choose a password for the new user: Complex one hopefully!
Re-enter password to verify: Retype what you just type in!
Configure the clock: It should detect your time zone properly
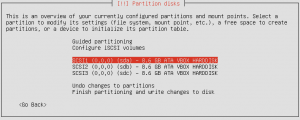
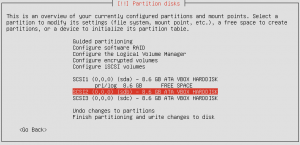
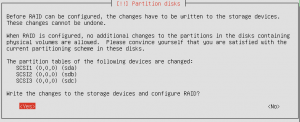
Here you DO need to select your physical disk and prep it so you can set it up via the software RAID. If you don’t, it just won’t work. You have to do this for each disk you want in the RAID setup. In my example, I run through it on all 3 disks so keep that in mind as you walk through the tutorial. It might be redundant but for real noobs or someone looking for a thorough tutorial they’ll appreciate it because the screen results do change.
Here I think I forgot to take some screen shots, it’s confusing a bit when you’ve got 50+ screen shots! You should have a screen after you prep the disks all with a:
SCSI# with “FREE SPACE” like the above pic on it.
So I should have a pic on it with all 3 of my disks with “FREE SPACE” of 8.6 GB but I’m missing that.
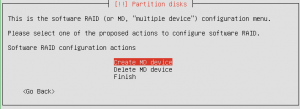
I’m ALSO missing the screen shot where we go up in the list after all the disks are prepped and then we select “Configure Software RAID” which then takes you to the screen shot below! I guess I’m just not that good!
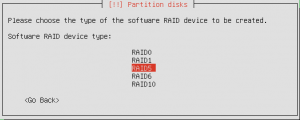
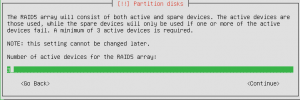
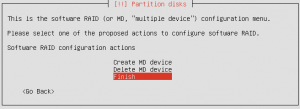
Hopefully here you understand which software RAID setup you want – in my example I use RAID5 in my VirtualBox setup just for the tutorial. If you wanted RAID10 you’d be doing the work on all 4 or more disks that you have.
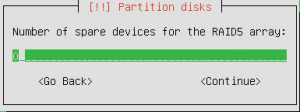
This is a pretty cool feature actually, a lot of hardware RAID setups let you use a “spare” disk, it’s a hot spare…spinning and running. If you lose a disk one of the spares will take over as though you slapped it in and replaced a disk. You can then replace the broken disk. I’m not sure what happens in this scenario with the software RAID setup. Does the new disk become the spare? Probably but you might want to test that theory out!
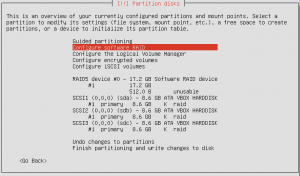
Here, even though I have “Configure software RAID” selected, it’s not what you should do. This just shows the new “RAID5 device” we made. I could probably carve that out but I left it for posterity.
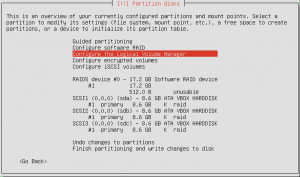
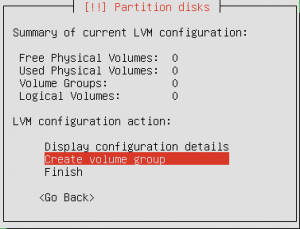
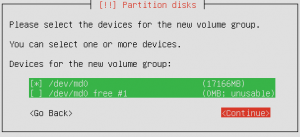
Now that we made out “disk” essentially, we bundled 3 disks into 1 disk (RAID5 device #0) we have to make logical volumes we can partition which will then hold the data. Think of it as this point as all we have now is a blank hard drive. The “Volume Group” we’re going to make (and you can name it whatever you want I just named it Zentyal) will house the volumes / partitions where our data will live.
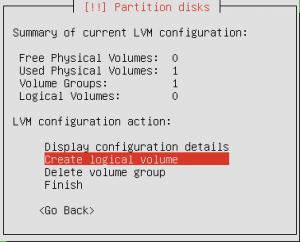
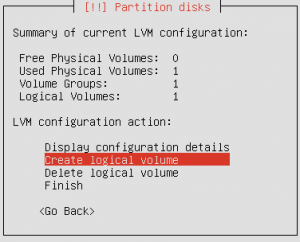
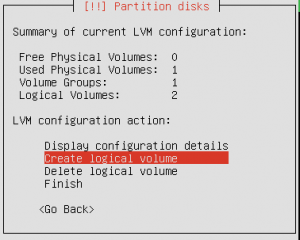
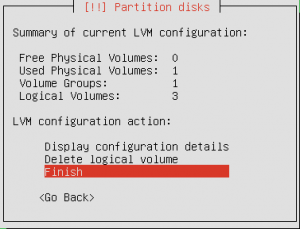
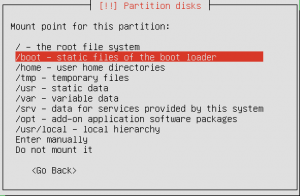
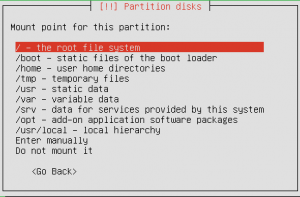
At this point we’ve got 1 physical volume (a disk) and 1 group, I like to think of that as basically the same thing even though it probably isn’t. What we’re going to do now is partition the Volume Group (disk imo) and partition it. In linux you typically see /boot, /usr, /tmp, /home, and others. For Zentyal you will be out of luck booting the system without making a /boot volume and a “/” root volume. Those are the two minimums I’ve found from experience! The first time I muddled through this I didn’t have a /boot volume and the system wouldn’t boot!
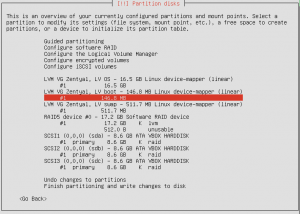
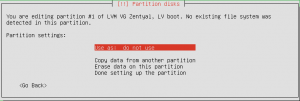
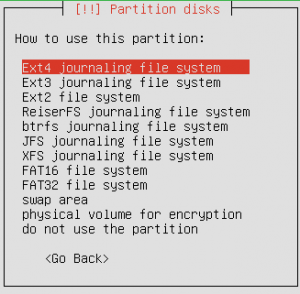
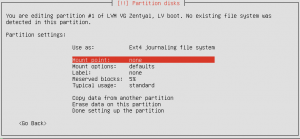
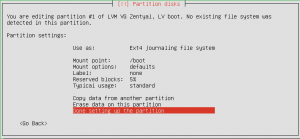
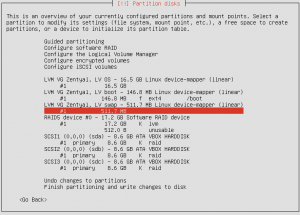
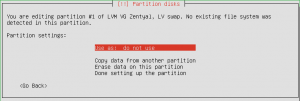
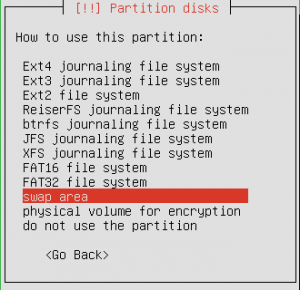
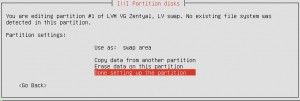
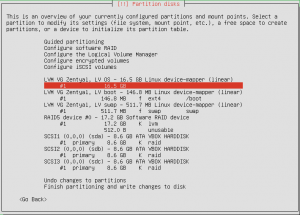
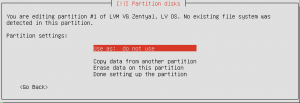
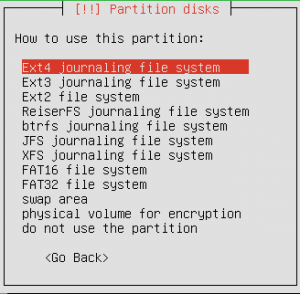
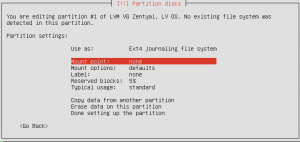
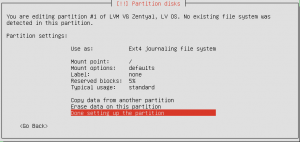
Now that we’ve partitioned out the disk we have to go into each partition and tell it what we want it to be. In my example all I do is partition the volume in 3 sections, /boot, /swap, and “/” or root. If you care to you can do the other volumes noted in the Ubuntu tutorials on other sites including the official Ubuntu document page BUT I find it much easier for most of the installs I do to simply have the afore mentioned 3 partitions.
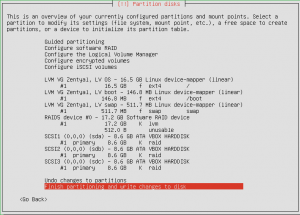
Notice here how we now have: Out “OS” <- An arbitrary name I used, it’s actually “/”, also swap and boot.
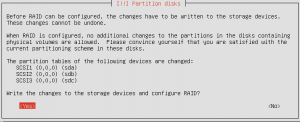
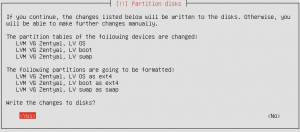
Commit your changes!
…and we have INSTALL!
Now…there are a few more screens I don’t think it necessary to document like are you using a proxy, blah blah blah. If you got this far just click ok or next next next. When it asks if you want to install the GRUB boot loader – ahhhhhhhh YEAH!
That’s it. You’ve now installed Zentyal in a software RAID5 (of if you chose a different one then you’ve installed that too) configuration.
Results once Zentyal finally boots up, you choose your install options, etc, etc, etc.
Please feel free to comment.












Hi.
I am trying to install Zentyal 4.0 on a raid 5 system, and I am able to install with above steps. However the grub installation fails and I am unable to boot. I have also tried Ernie’s comments (changing the boot order of the harddisks). Do you know what might be wrong?
When I rebooted the system upon setup completion (stage 1) the PC would not get past BIOS. I did find many comments about Zenytal and Grub not working well with RAID, so I thought it may be that issue.
I remembered in a test setup, before I found this page that Zentyal installed onto the 3rd SATA drive (of 4 installed). This I found strange, the bios or whatever decided drive 3 is the primary – I would think #1 would come before 2,3,4..
Anyway, some others may find this solution helpful – I changed the boot priority order in bios to start Sata-3. And System booting as expected. Amazing. Grub clearly installed on the 3rd drive only.
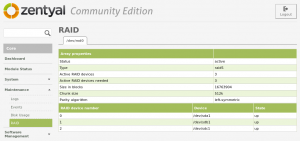
That’s interesting Ernie – are you sure it’s a software RAID? I would think the disks are in a group and seen as one unit BUT you might have run into a unique problem there. I can’t remember what order the BIOS was I was working on in the system I was working on. What’s your Zentyal dashboard say in: Maintenance > RAID say? http://rafaelwolf.com/wp-content/uploads/2013/02/zentyal_software_raid_install_54.png
It is an Asus mb with Sil 3114 on board. 4 SATA plugs for “Raid” and another 4 for standard.
When I removed Windows 2003 server, I found the RAID in DOS bootup properly, no issues. One drive (system) visible. In Linux/Zentyal I saw 4 separate drives. Changing boot order (to 3rd sata) allowed system to boot.
Here is my RAID dashboard clip:
http://easyimghost.com/ImageHosting/8729_zentyalraidernie.jpg.html
Yes, RAID-10 as I have 4 drives which I wanted mirrored and not wasting a huge amount of space. We have a separate redundant backup in case anyway. I dont think the RAID10 made the 3rd drive the primary.
The reason is that I installed previously as a test, using the RAID motherboard connectors, though it did not work – and found that the 3rd SATA was the one Zentyal installed onto.
Really doesn’t matter to me, as long as I found a working solution. Running for a few days now with no issues. Lots of work to go continuing the setup, with all the other services I need to use. In my spare time of course :)
PS: Your website often gives me an error when posting a reply “ERROR: Unreadable CAPTCHA token file” and then does not keep the message I was writing. Very annoying for sure!
This was a very nice explanation of softRAID setup on Zentyal. Got stuck on this whole RAID thing as I removed the old Windows 2003 server with Silicon Image 3114 raid controller hoping Linux could handle it. But sadly not since it is not a true raid, it just looks like it in Windows and bios, but not Linux – it’s too smart.
Your instructions worked flawlessly, and I am happy I found you.
This is my first Linux server, and only the second Linux system I have ever installed, all my years of work have been in Windows.